Showing posts with label Fermented Soy. Show all posts

Tuesday, September 13, 2016

Fermentationist Certification: Ferment 10 ~ Tempeh

Tempeh


Tempeh originated in Indonesia and is one of several Asian culinary moulds. Similar to the European method of using mould to ferment cheese, they have long been used in Asia to ferment grains and legumes. Tempeh has become popular throughout the western world as interest in plant based diets has increased.  Tempeh is traditionally made with soybeans however other legumes may be substituted.  Grains such as brown rice may also be mixed with the legumes or fermented on
their own.

Health Benefits of Tempeh:

The processing involved in making tempeh decreases the level of phytic acid in the legumes. The bio- availability of certain minerals, such as zinc and iron, is improved while the total concentration of many minerals, including calcium and magnesium, is increased. Tempeh is more easily digested than cooked soybeans, with reduced oligosaccharides and improved protein availability. Tempeh is a source of Vitamin B12, making it an excellent addition to a vegetarian diet.


Compared with raw soy beans, tempeh:
  • is more digestible
  • has improved vitamin B12 content
  • has bacteriocins which stop contamination
  • has an increased folate content
  • has reduced levels of trypsin inhibitors
  • is fibrinolytic subtilizing meaning it refines the process of breaking apart blood clots
  • has antioxidative properties
  • has GABA, HAA, and isoflavonoids

Ingredients:
Starter from Cultures For Health

  • 2 cups dried soybeans
  • 2 tbsp vinegar
  • water
  • 1 packet culture

I purchased my starter from Cultures For Health.  I brought it in from the US so if any of you Canadians want some, I have several packs of Traditional and Soy Free.


Step by Step:

Measure 2 cups of dry soybeans

Soybeans must first have their tough outer hulls removed. If the hulls are left intact the mold cannot penetrate the bean and spoilage will occur instead of fermentation.

De-hulling beans:
Soaking

  • Soak the beans in fresh water overnight or for 10-12 hours. the beans may triple in size, so use a large pot and plenty of water.
  • Massage the beans with your hands and keep working until the beans are all split.  The hulls will float to the top.
  • Use a colander to drain out the water.  It may take several rinses to remove all the hulls.
***If you own a burr-type grain mill, you will save some time and some possible hand cramping!***


Put the beans in a large pot and add fresh water to cover by 3-4 inches.  Bring to a boil and cook, uncovered, for 30 minutes, until the beans start to become tender but are not yet soft. As the beans are cooking more hulls may rise to the surface ~ skim these off. (There may still be hulls left in the beans after cooking is complete ~ this is fine ~ as long as they have separated from the beans the fermentation will proceed normally.)

Drying

Drain the beans and spread on a towel to dry and cool.  


Poking holes through baggy

While the beans are cooling, prepare a 1quart ziplock bag to ferment them in. The mould requires oxygen, so the bag must be poked all over with a pushpin, thick needle or a fork to create holes. Space them about ¾” apart.


Ready to incubate
When the beans are dry, place them in a large dry bowl and toss with the vinegar, and then the culture. Stir well to make sure the culture is evenly distributed. Pour the inoculated beans into the prepared ziplock bag, seal it, and flatten into a thick pancake. It should be approximately 2” thick.

To culture the mould, the inoculated soybeans must be incubated at a temperature of 85° to 91°F or for 24-48 hours. Verify the temperature using a thermometer placed in the beans, rather than next to them.  

The tempeh is ready when the mycelium has spread all throughout and around the soybeans, making a firm cake. If the tempeh is left to ferment long enough, sporulation may occur, causing black spots to form on the white mould. This is normal, although the flavour will be a bit stronger. Try eating tempeh at different stages to see which taste you prefer.

What to expect:

0-12 Hours ~ Maintain heat using a dehydrator, insulated container or oven with a pilot light.
12-24 Hours ~ The fermentation should cause the beans to generate their own heat at this point.  When this occurs, reduce or eliminate the external heat source.
24-36 Hours ~ After 24 hours, white spores will begin to cover the surface of the beans and will continue to grow through the bean mass.
36-48 Hours ~ After 36-48 hours, when the beans have become a firm mass held together by the white spores, the tempeh is finished.  This can take up to 4 days.

Progress:

0 hours ~ 05.09.2016 @ 2PM ~ I used a dehydrator to incubate my tempeh.  I also used starter that I received from a friend.  I used 2 tbsp for this batch of tempeh.

1-7 hours ~ 05.09.2016 @ 3-9PM ~ I had trouble keeping the temperature between 85° & 91°F.  What worked for me is putting two glass crocks full of boiling water near of the front of the dehydrator and the tempeh at the back of the dehydrator.

My preferred setup in a dehydrator

16 hours ~ 06.09.2016 @ 6AM ~ Temperature was down to 77°F by the time I woke up.  I got it back up to temperature by boiling more water.
20 hours ~ 06.09.2016 @ 10AM ~ Tempeh started making its own heat.  It got up to 101°F before I caught it and allowed heat to escape.
25 hours ~ 06.09.2016 @ 3PM ~ Temperature has been constant at 94°F ~ Mycelium starting to spread throughout soy bean mass.

@ 25 hours ~ side 1
29 hours ~ 06.09.2016 @ 7PM ~ Soy beans are now one mass.  I started to see some sporulation (grey spots) starting to form.

@ 29 hours ~ side 1
@ 29 hours ~ side 2

35 hours ~ 07.09.2016 @ 1AM ~ Woke up to find temperature at 105°F and was unable to cool it down.  I stood it upright on the counter so both sides could cool.  It is amazing how much heat this process generates!!!

@ 35 hours ~ side 1

@ 35 hours ~ side 2

41 hours ~ 07.09.2016 @ 7AM ~ Harvest time ~ I had to leave for work so I decided to unwrap it and let it cool down before putting it into the fridge.  I probably would have let it go a little longer if I could monitor it closely.
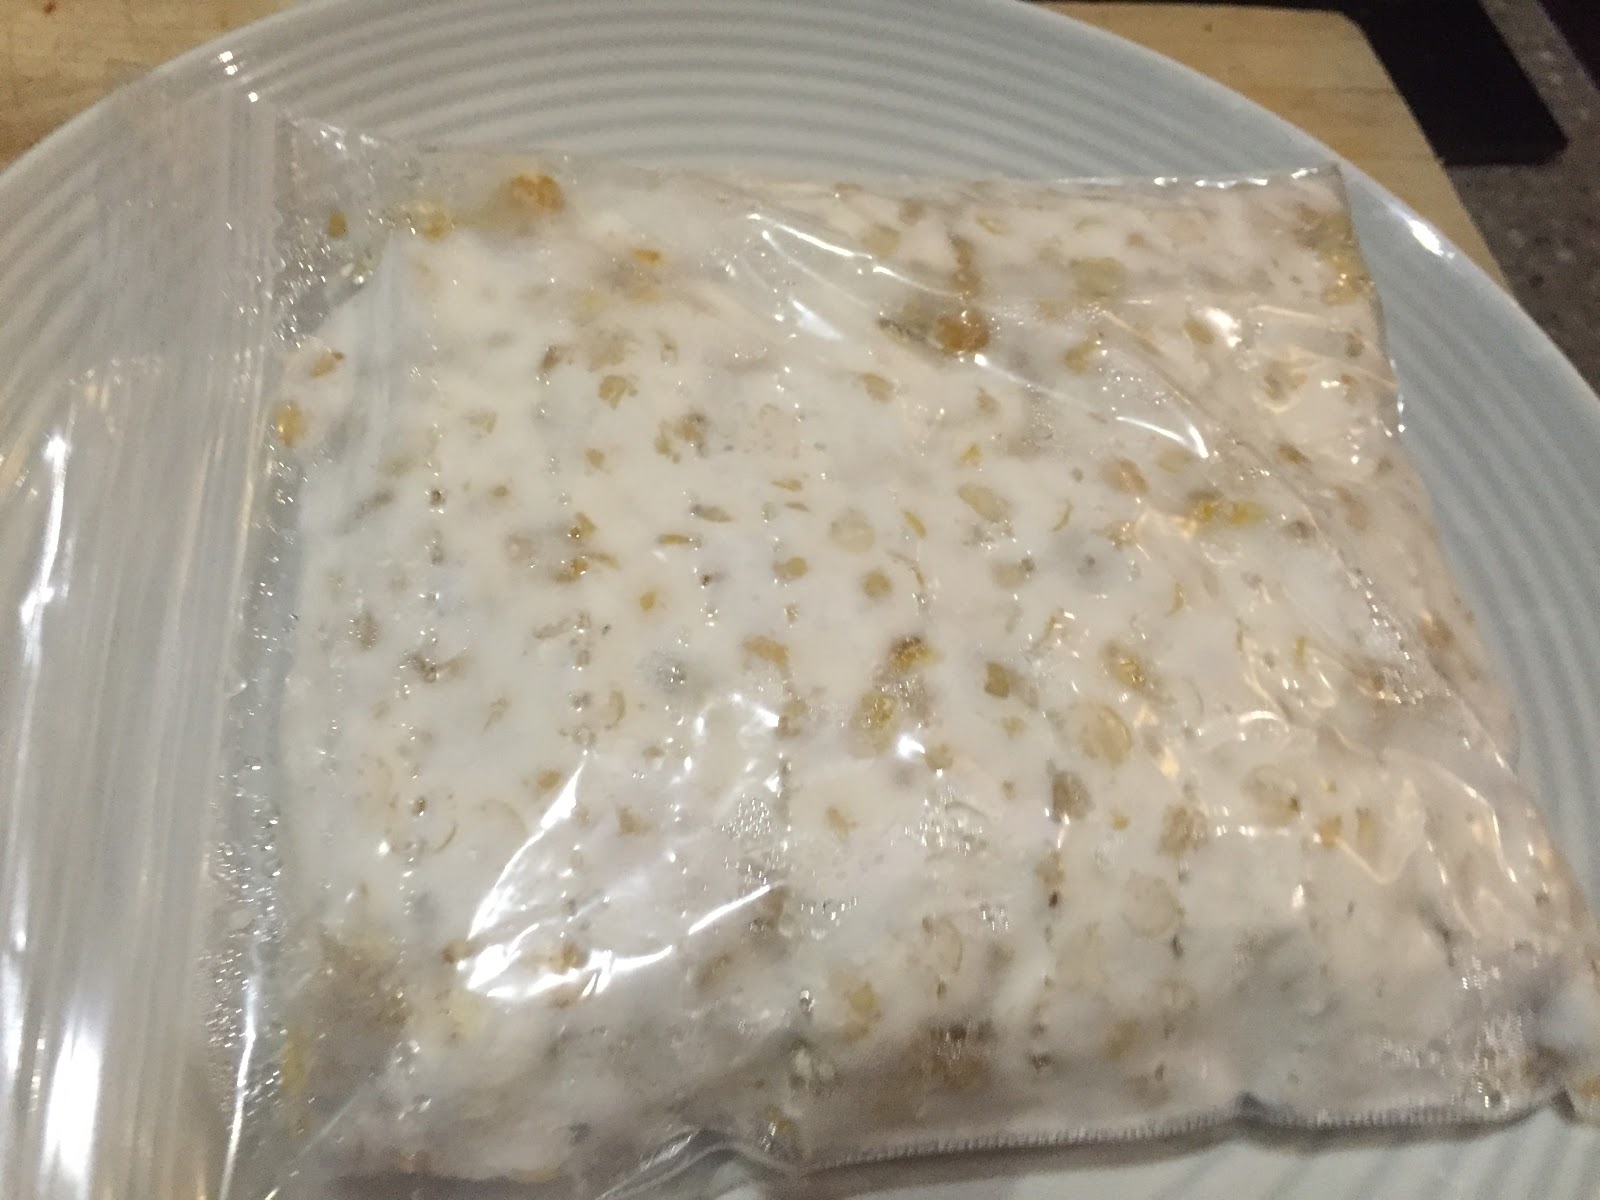
@ 41 hours ~ side 1
@ 41 hours ~ side 1

@ 41 hours ~ side 2

11.09.2016:  Tempeh needs to be cooked before eaten.  I decided to make a peanut sauce and fry up the slices in coconut oil.

Enjoying my Tempeh


Thursday, July 07, 2016

Fermentationist Certification: Ferment 3 ~ Miso

MISO

Miso is a Japanese form of fermented bean paste.  It is made by mashing well-cooked beans with koji (grain grown with the mold Aspergillus oryzae), salt and often mature miso (also known as seed miso).  Miso is one of the few fermentation processes that is purely a fungus.

White Miso made with soy beans & both Barley & Rice Koji


The benefits of eating Miso are plenty so I will only list a few!

  • Inexpensive source of protein, probiotics, and minerals
  • Longevity: a bowl a day keeps the doctor away
  • Amino acid profile similar to meat
  • Contains vitamin B12
  • Alkalineforming
  • (makes the body more alkaline)
  • Prevents radiation sickness
  • Helps detox heavy metals
  • Cancer protective
  • Neutralizes environmental toxins
  • High in enzymes
  • Low in phytates
  • Improved digestibility

KOJI

Koji is the inoculant that is used to start the process of fermentation derived from the Chinese word meaning “moldy grain.” Koji is rice infused with the mold (all molds except slime and water molds are a type of fungus), Aspergillus oryzae . It provides all the enzymes necessary to break down substrates into metabolizable products.  

If you want to make your own koji, you can learn this in the Art of Fermentation authored by Sandor Katz.  


I purchased my Koji through Cultures for Health, www.culturesforhealth.com : Search for either Organic Brown Rice Koji (gluten free) or Traditional Barley Koji (depending on your preference).  I purchased both as I wanted to experiment with the taste of each.


Organic Rice Koji & Traditional Barley Koji

THE MISO SONG

You cannot make Miso at home without listen to The Miso Song! 

 "Sing and dance along to making miso at home! The hand drawn animation is a play along song video with a charming melody and cute characters. you can enjoy your very own “musical workshop for homemade miso”. Experience the “homemade miso” culture that is traditionally inherited throughout the regions of Japan. Taste the deep, rich culture of fermentation and discover the joy of making your own homemade."


STEP BY STEP


Although Soy is the traditional bean, some people don’t want to eat or cannot eat soybeans. Using the red miso recipe, you can replace the soybeans with any other kind of bean. Black beans, mung, adzuki, pinto, you name it.  You can use this same general procedure with a different bean to
make any kind of miso you desire.

WHITE MISO

(to make 1.75 Cups)

1/2 Cup dry soybeans
1 Cup dried koji (notice that you have more koji in white miso)
3.33 Tablespoon sea or kosher salt (noniodized)
1 Cup mixing liquid (see instructions below)
Fermenting vessel or ceramic, glass, wooden, or food grade stainless steel crock

Spouted Soy Beans

  1. Soak beans overnight. Beans are best soaked because they contain enzyme inhibitors that can strain the digestive tract when consumed in excess. Soaking makes them easier to digest and their nutrients more readily available. To soak beans leave them overnight in salt water. Salt activates enzymes that neutralize enzyme inhibitors. Discard this liquid and rinse the beans before starting the next step. This is not a traditional method but I let mine sprout!
  2. Cook using a pressure cooker (~20 minutes) or in a pot until soft.
  3. Drain the beans, but save the liquid.
  4. Make a brine using 1/2 Cup of this liquid, dissolve half the salt into it.
  5. While waiting for the liquid to cool, mash the beans into a smooth paste.
  6. When brine is below 105 degrees, mix into the koji. You don’t have to take the temperature because 105 degrees feels hot to the touch. If it is warm to the touch it is below 105 degrees Fahrenheit.
  7. Add the mashed beans and stir well. Create a consistency of a paste by adding as much mixing liquid as needed.
  8. “Grease” the sides of the miso crock with a tablespoon of sea salt.
  9. Sprinkle about 1/2 Tablespoon sea salt onto the bottom of the crock and around the sides. Add the miso to the crock taking care to smash it in fully to the crock so that no air bubbles remain.
  10. Sprinkle remaining salt on top of the miso and cover with seaweed, wax paper, etc.
  11. Place a plate on top of the miso itself and put a weight on top of that.
  12. Cover the miso with a cloth bag to keep the flies out. It will be sitting for 68 weeks optimally if you live in a cooler climate (most recipes suggest 46 weeks. 
    Experimenting with both Rice & Barley Koji
  13. Remember to label your miso with the date as you WILL forget!
  14. When ready to harvest, scrape off the top yucky layer and behold the glorious deliciousness!
  15. Blend it in a food processor with a little water because the koji grains will still be hard from having fermented for a short period of time. This creates a smooth paste that is easy for mixing into soup.
  16. Store it in the fridge in a glass container with a cork or plastic lid. You may also use plastic containers with a plastic lid. This is how most miso is sold in the store, but is my least preferred way of storing it because of the possible leaching of chemicals from the plastic. Make sure to place a piece of wax paper directly on top of the miso then put the lid on. Try to keep the top as level as possible. This will make your product last longer. For storage, don’t use metal lids.


RED MISO

(to make 2.25 Cups)

1 Cup dry black beans
1 Cup dried koji
4 Tablespoon salt
1 Cup mixing liquid
1 Tablespoon (15 grams) seed miso (live unpasteurized miso starter)
Fermenting vessel or ceramic, glass, wooden or food grade stainless steel crock

Mashed Black Beans
  1. Soak soybeans overnight. Beans are best soaked because they contain enzyme inhibitors that can strain the digestive tract when consumed in excess. Soaking makes them easier to digest and their nutrients more readily available. To soak beans leave them overnight in salt water. Salt activates enzymes that neutralize enzyme inhibitors.  Discard this liquid and rinse the beans before starting the next step.
  2. Cook using a pressure cooker (~20 minutes) or in a pot until soft.
  3. Drain the beans, but save the liquid. 
  4. Make a brine using 1/2 Cup of this liquid, dissolve half the salt into it. 
  5. While waiting for the liquid to cool, mash the beans into a smooth paste. 
    Boiling Liquid mixed with koji
  6. When brine is below 105 degrees, mix in seed miso. Then mix into the koji (I used barley koji only for this experiment). You don’t have to take the temperature because 105 degrees feels hot to the touch. If it is warm to the touch it is below 105 degrees Fahrenheit.
  7. Add the mashed beans and stir well. Create a consistency of regular miso by adding as much mixing liquid as needed. “Grease” the sides of the miso crock with a bit of sea salt.
  8. Sprinkle about 1/2 Tablespoon sea salt onto the bottom and sides of the crock. Add the miso to the crock taking care to smash it in fully to the crock so that no air bubbles remain.
  9. Sprinkle salt on top of the miso and cover with seaweed, wax paper, etc. Place a plate on top of the miso itself and put a weight on top of that.
    All Ingredients Combined
  10. Cover the miso with a cloth bag to keep the flies out. It will be sitting for months (or years if you want.) It is traditionally made in the spring and harvested in the fall.
  11. Label and date or you will forget what it is!!! Write on the label when it will be ready (6 months after you make it.) Put harvest date in your calendar if you want. When ready to harvest, scrape off the top yucky layer and behold the glorious deliciousness below!
  12. The very bottom layer may be very salty. Remember all that salt you coated the bottom with? This can be mixed into the miso when it’s done or discard. It’s up to you.
  13. Store it in the fridge in a glass container with a cork or plastic lid.
    I used a pickle pebble in this vessel

    You may also use plastic containers with a plastic lid. This is how most miso is sold in the store, but is my least preferred way of storing it because of the possible leaching of chemicals from the plastic. Make sure to place a piece of wax paper directly on top of the miso then put the lid on. Try to keep the top as level as possible. This will make your product last longer. For storage, don’t use metal lids.


Red Miso ready to start the fermenting process!

Interesting Facts:

  • The saltiness mellows out over time. By using more koji and less salt, the resulting miso is sweeter from all the carbohydrates in the rice being digested into simple sugars by the yeasts and bacteria. Miso fermentation is best in a place where it doesn’t get too hot or too cold like a root cellar or house with a stable temperature.
  • The rice Koji is added as an activator to the soybeans. Sometimes lactic acid bacteria such as bifidobacteria and lactobacilli are added as well. These come from the 'seed miso,' which is a spoonful of miso that has already matured and aged for a minimum of 6 months.  Probiotics are only found in miso that has been fermented for 6 months or longer. This means that red and brown miso is more likely to contain probiotics, but sweet white miso has little to none.

Progress:


White Miso ~ I used organic soy beans however I used barley koji in two jars and brown rice koji in two jars and will harvest each at 1.5 & 3 months to taste the difference!


  • 16.06.2016:  Start date 
  • 12.09.2016:  Harvested sample #1 (barley vs. brown rice koji) at just under 3 months.  I found that the brown rice miso smelled appealing and the barley miso smelled like beer.  I made my first miso soup!  

  • Miso Soup
  • 16.12.2016:  6 month anticipated harvest date for Sample #2 (barley vs. brown rice koji)

Red Miso ~ I used organic black beans for the entire batch and barley koji only.  It made 5 jars so I am experimenting with consistency vs flavours over time in this experiment.


  • 05.07.2016:  Start date
  • 01.01.2017:  6 month anticipated harvest date
  • 01.07.2018:  1 year anticipated harvest date
  • 01.07.2019:  2 year anticipated harvest date
  • 01.07.2020:  3 year anticipated harvest date
  • 01.07.2021:  4 year anticipated harvest date