Vegetables and Brine

Dilly Beans
This week it is all about vegetables that are fermented using a brine. You can look at this as "Pickles" without vinegar! Unlike sauerkraut and kimchi where the added salt helps to pull the moisture out of the cabbage to make its own brine, there are many vegetables that require a saltwater solution to create the anaerobic environment necessary to ferment.  |
| Dilly Beans |
Some examples of this are cucumbers/pickles, dilly beans, peppers, carrots, okra, and many more.
Health Benefits:
- Fermented pickles are full of enzymes which help aid digestion.
- Fermented pickles are a good source of lactic acid, which improves digestion and helps alkalize the body.
Basics of fermenting vegetables with brine:
All raw vegetables carry many organisms which can lead to either preservation or spoilage. The key to preservation is providing an environment which favours the beneficial microbes over harmful ones. Beneficial microbes prefer an anaerobic environment (one in which oxygen is not present). This environment is created by submerging vegetables in salty brine.In salt brine lactic acid bacteria quickly proliferate, using up the available oxygen and excreting lactic acid and carbon dioxide. The rapid reduction of oxygen destroys many of the aerobic microbes which would lead to spoilage. The lactic acid also lowers the pH of the brine, inhibiting other microbes which can cause illness.
Making Salt Brine
Vegetables can be fermented in brines from 1.5% to 5%. There are several bacteria that work together to ferment vegetables and they all have a different optimum salinity. A brine of 2% to 3% tastes the best. Brines higher than 5% will hinder bacterial activity.Cucumber pickles should be fermented in a brine of 3.5% for half-sours or 5% for full-sours.
Below are instructions for mixing brines. All measurements used fine grind (non-iodized) table salt.
For 1 quart of water:
- 2% = 19 grams or 1 tablespoon
- 2.5% = 24 grams or 1 tablespoon + 1 teaspoon
- 3.5% = 33 grams or 2 tablespoons
- 5% = 48 grams or 3 tablespoons
 |
| It is important to get your brine ready so the salt is fully dissolved |
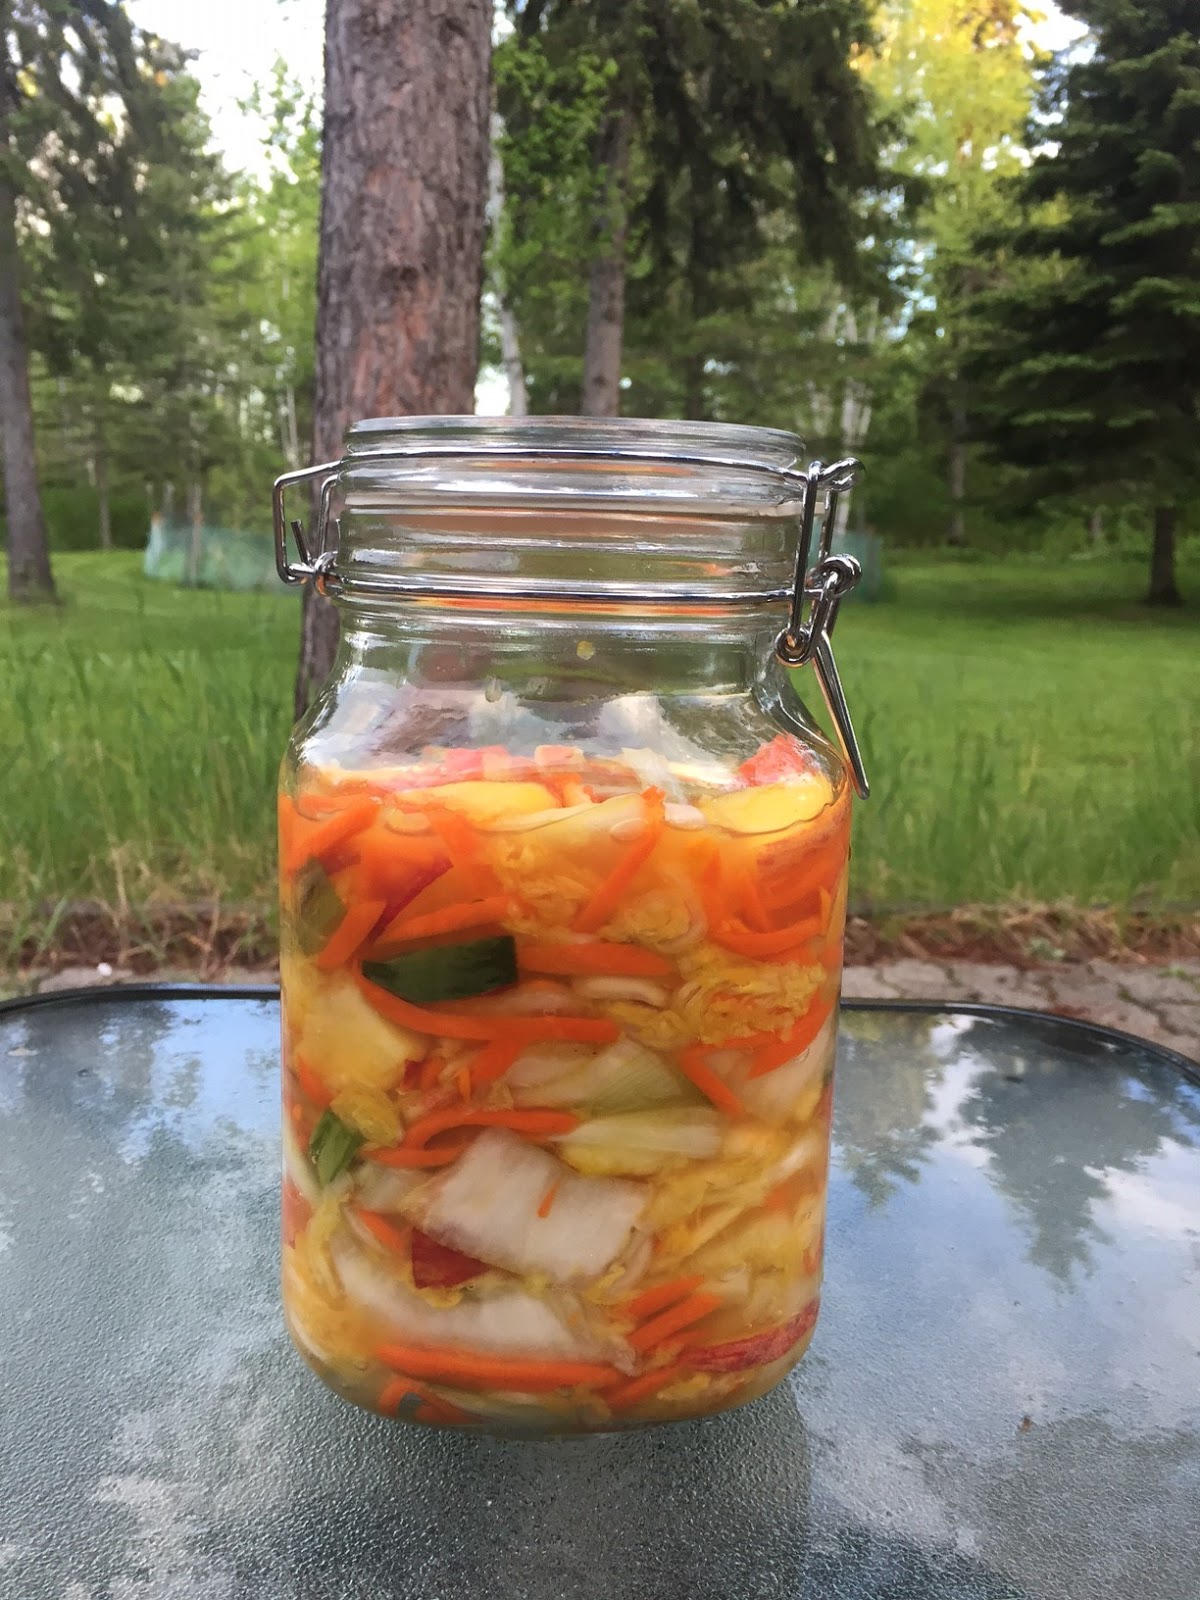
Spicy Dilly Beans
 |
| Dilly Beans |
1 pounds green/yellow beans
3 cloves garlic, peeled and sliced
12 teaspoon red pepper flakes (I omitted)
1 flowering dill frond
2-3 cups 2% brine
- Rinse your vegetables in cold water, but do not use any soap or scrub them very hard. Place the herbs and spices in the bottom of a clean jar. Trim the vegetables. Pack the vegetables in the jar, leaving about 2 inches space at the top. Pour brine over the top to completely immerse the vegetables.
- Place a weight on top. Close the lid, but do not seal tightly if using a mason jar. Set in a cool (60º-70º), dark place to ferment.
- Fermentation will usually begin in 12 days as bubbles form at the top of the brine. Soon the vegetables will lose their bright color and the brine will turn cloudy. If the jar is not tightly sealed you may begin to smell the pickles as the gases escape. These are signs of good fermentation and do not indicate spoilage.
- Active, bubbly fermentation may cease after 5-7 days, or last 3-4 weeks, depending on many factors including the sugar content of the vegetables and the ambient temperature. Wait until the vegetables have ceased bubbling to taste them. They should be pleasantly sour. If the vegetable pieces are large or woody, they may still taste raw in the center. If this is the case, let them sit out to continue fermenting so they may pickle all the way through. Sample every 3-5 days to check for doneness. Vegetables that are soft, such as a turnip, will be better if fermented for a shorter time so they do not become mushy.
- When the vegetables have become pickled, to a taste that you prefer, remove the weight and move the jar to the refrigerator to slow fermentation. Refrigeration slows, but does not stop fermentation. These pickles will last for many weeks or even months in the fridge, but eventually they will turn soft or too sour so try to eat them in 2-3 months.
Cucumber Pickles
This is the kind of old-fashioned pickle that your grandparents may remember eating straight from a wooden barrel at the general store or a large crock in the cellar. The flavour is bright and tangy, without the harsh acidity of vinegar. Nothing beats the snap of biting into a crunchy dill pickle! Fermentation of cucumbers differs from other vegetables because of their high water content. As the salt pulls water out of the cucumbers the brine becomes diluted, so it is necessary to start with a higher salinity. A 5% brine (3 Tablespoon salt dissolved in 1 quart water) will result in a full-sour pickle; a 3.5% brine (2 Tablespoon salt dissolved in 1 quart water) yields a half-sour pickle.
Crunch is crucial in a good dill pickle, but cucumbers are more prone to turning soft than other vegetables. One reason for this is that there is an enzyme present in the blossom that causes softening. Removing a very thin slice from the blossom end of each cucumber is recommended. Adding tannins to the brine will also help retain crispness. Tannins occur naturally at various levels in the leaves of many plants. Grape leaves are the traditional source of tannins when making pickles, but oak, sour cherry, and horseradish leaves can be substituted.
Freshness of the cucumbers is also important when making dill pickles. Choose small, firm cucumbers that are similar in size and have been recently picked. Attempting to make dill pickles out of season with cucumbers that have been shipped a long distance is not likely to yield good results. Kirby cucumbers should be used as they have a firmer flesh and are less watery than salad cucumbers. Do not buy any cucumbers that have been waxed.
If the cucumbers were not picked that morning they should be allowed to soak in a sink full
of ice water while preparing the other ingredients, or at least 2 hours, to freshen them up.
Dill Pickles
(Makes 1 gallon) |
| Dill Pickles |
4 Pounds small kirby cucumbers
1 handful flowering dill fronds
1 or 2 bulbs garlic, cloves separated and peeled
4 bay leaves, crumbled
4-6 small fresh or dried chilies
1 Tablespoon peppercorns
1 handful grape leaves (or other tannin-rich leaves)
2-3 Quarts 5% or 3.5% brine
If the cucumbers are not freshly picked, allow them to soak in a sink full of ice water for at least 2 hours while preparing other ingredients. Then remove a thin slice from the blossom ends. In a 1gallon crock place dill fronds, garlic cloves, crumbled bay leaves, chilies, peppercorns, and grape leaves.
Tightly pack cucumbers in crock, placing larger cucumbers at the bottom. Put a plate or other weight on top of the cucumbers and add brine to completely submerge. Cover the crock with a towel held in place with a rubber band. In a few days fermentation will begin. Bubbling can last anywhere from 2-4 weeks, depending on temperature. When bubbling has ceased, sample a cucumber. If it has not
pickled through to the center give them some more time. When they are fully pickled, transfer to fridge for storage. (A half-sour pickle will still be raw and crunchy in the center.)